
veeder-root tls-350 troubleshooting manual
This manual provides comprehensive guidance for diagnosing and resolving issues with the Veeder-Root TLS-350 system, ensuring optimal performance and compliance with safety standards.
1.1 Overview of the TLS-350 System

The Veeder-Root TLS-350 is an advanced system designed for environmental monitoring and leak detection in fueling systems. It ensures compliance with safety standards and protects the environment by detecting leaks early. Key components include sensors, probes, and the ECPU board, which monitor fuel levels and detect potential leaks. The system is known for its accuracy and reliability, essential for preventing environmental hazards. Regular maintenance and troubleshooting are vital, as outlined in the manual. Understanding the TLS-350’s architecture and components is the first step in effective troubleshooting and maintenance, ensuring long-term efficiency and safety. Its adaptability to various fueling environments makes it a versatile solution.
1;2 Importance of Regular Troubleshooting and Maintenance
Regular troubleshooting and maintenance are crucial for ensuring the Veeder-Root TLS-350 system operates efficiently and accurately. Proper maintenance prevents hardware malfunctions, software glitches, and unexpected system failures. By addressing issues promptly, operators can minimize downtime and maintain compliance with environmental and safety regulations. Regular checks also help in identifying and replacing faulty components before they cause significant problems. This proactive approach ensures the system’s reliability in detecting leaks and monitoring fuel levels, which is essential for preventing environmental hazards. Consistent maintenance further extends the lifespan of the equipment, making it a cost-effective solution. Therefore, adhering to a routine maintenance schedule is vital for optimal performance and safety.

Preparation for Troubleshooting
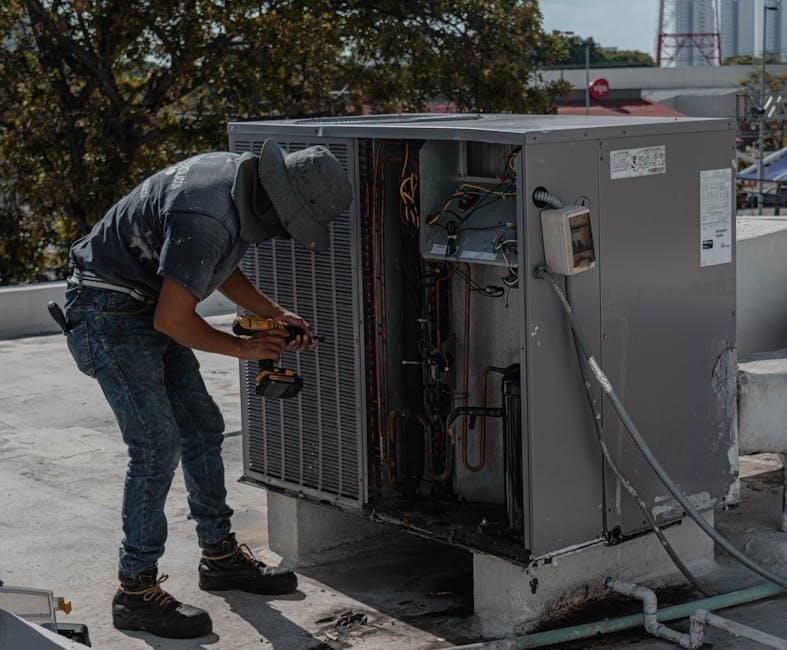
Begin by gathering essential tools, such as a chip removal tool, and review the TLS-350 system architecture to understand its components and connections thoroughly.
2.1 Gathering Necessary Tools and Equipment
To effectively troubleshoot the Veeder-Root TLS-350 system, ensure you have the following tools and equipment: a chip removal tool for handling software modules, a multimeter for verifying wiring and connections, and intrinsic safety testing devices. Additionally, gather system manuals, diagnostic software, and replacement parts like ECPU boards or memory modules. Always refer to the official Veeder-Root manual for specific tool requirements and ensure compliance with safety standards during the process. Proper preparation of these items will streamline the troubleshooting workflow and help identify issues efficiently.
2.2 Understanding the System Architecture
The Veeder-Root TLS-350 system architecture consists of a central console, sensors, and probes that work together to monitor fuel levels and detect leaks. The console acts as the control unit, processing data from sensors and managing system operations. Sensors and probes are connected through specific wiring and conduit systems, ensuring accurate data transmission. The system incorporates intrinsic safety checks to prevent hazards in flammable environments. Key components include the ECPU board and software modules, responsible for data processing, alarms, and communication. Calibration of sensors is crucial for accurate measurements, and the system’s software manages data interpretation and user interface. Understanding this architecture aids in diagnosing issues and maintaining optimal performance. Proper configuration and adherence to environmental specifications ensure reliability in various conditions.
Common Issues and Symptoms

Common issues include hardware malfunctions, software glitches, and sensor connectivity problems. Symptoms may involve error codes, system freezes, and inaccurate readings requiring prompt troubleshooting.
3.1 Identifying Hardware Malfunctions
Hardware malfunctions in the Veeder-Root TLS-350 system often manifest as faulty sensors, damaged wiring, or malfunctioning control modules. Symptoms may include inconsistent readings, system shutdowns, or failure to detect leaks. To identify hardware issues, inspect sensors and wiring for physical damage or corrosion. Verify connections to ensure they meet Veeder-Root specifications. Use diagnostic tools to isolate faulty components, such as the ECPU board or memory modules. If intrinsic safety checks fail, hardware malfunctions could be the root cause. Referencing error codes and troubleshooting guides can help pinpoint specific hardware failures, enabling targeted repairs or replacements. Always ensure compliance with safety standards during hardware inspections and repairs.
3.2 Recognizing Software-Related Glitches
Software-related glitches in the Veeder-Root TLS-350 system can manifest as unexpected error codes, system freezes, or communication failures between components. Common issues include outdated or corrupted software modules, incorrect system configurations, or compatibility problems with integrated devices. Symptoms may also include inconsistent data displays, failed intrinsic safety checks, or inability to perform diagnostics. To identify software issues, review system logs for specific error codes and verify software versions against the latest updates. Use diagnostic tools to isolate software-related faults and perform system resets or reinitialization if necessary. In severe cases, reinstalling or updating software modules may be required. Always consult the manual or contact technical support for persistent software-related problems to ensure proper resolution and system stability.
3.3 Interpreting Error Codes and Alarms
Understanding error codes and alarms is crucial for effective troubleshooting of the Veeder-Root TLS-350 system. Each error code corresponds to specific system malfunctions, such as sensor failures, communication issues, or software glitches. For instance, “System Failure 101” may indicate a hardware malfunction, while “Communication Error 203” could signal a loss of connectivity between components. Refer to the troubleshooting manual for a detailed list of error codes and their meanings. When an alarm is triggered, check the system logs to identify the root cause. Addressing these issues promptly ensures compliance with safety standards and prevents operational downtime. Always consult the manual or contact technical support if unclear about specific error conditions.
Advanced Troubleshooting Techniques
Utilize diagnostic tools and advanced testing methods to identify complex system issues, ensuring component isolation and thorough analysis for optimal Veeder-Root TLS-350 system performance and reliability.
4.1 Using Diagnostic Tools and Software
Employ Veeder-Root-approved diagnostic tools and software to identify system malfunctions. Utilize the Veeder-Root Diagnostic Utility to run self-tests, analyze error logs, and verify sensor connectivity. This software enables real-time monitoring of system performance, helping pinpoint issues swiftly. For advanced analysis, leverage the In-Station Diagnostic (ISD) tool to access detailed fault codes and historical data. These tools streamline troubleshooting by providing clear, actionable insights. Regularly update diagnostic software to ensure compatibility and access the latest features. Always follow the manufacturer’s guidelines when using these tools to avoid system damage or data loss. By integrating these resources, technicians can efficiently resolve complex issues, ensuring the TLS-350 system operates at peak efficiency.
4.2 Isolating System Components for Testing
Isolating components is crucial for effective troubleshooting. Start by disconnecting non-essential modules to eliminate variables. Use the diagnostic utility to deactivate specific functions temporarily. Physically isolate sensors and probes to test their individual responses. Ensure all safety protocols are followed when isolating components to prevent accidental activation or damage. By focusing on one part at a time, technicians can identify faulty elements without affecting the entire system. This methodical approach reduces downtime and ensures accurate diagnosis. Always refer to the manual for specific isolation procedures to maintain system integrity and safety. Proper isolation techniques are key to resolving issues efficiently and safely in the TLS-350 system.

Replacement and Repair of Components
This section outlines procedures for identifying and replacing faulty parts, ensuring safe and effective repairs. Follow guidelines for component replacement to maintain system performance and compliance.
5.1 Identifying Replaceable Parts and Assemblies
This section helps technicians identify components that may need replacement, such as the ECPU board, software modules, and memory. Use diagnostic tools to detect faulty parts. Refer to the manual for a detailed parts list and compatibility information. Inspect sensors, probes, and wiring for damage or corrosion. Utilize error codes to pinpoint malfunctions. Ensure all replacements meet Veeder-Root specifications for optimal performance. Always consult the troubleshooting guide for specific instructions on identifying and isolating defective assemblies. Proper identification ensures efficient repairs and minimizes downtime. Maintain accurate records of replaced parts for future reference and compliance with maintenance protocols.
5.2 Procedures for Replacing Faulty Modules
Replacing faulty modules in the Veeder-Root TLS-350 system requires careful execution to ensure system integrity. Begin by powering down the system and disconnecting power sources. Use a chip removal tool to safely extract faulty components like software modules or memory chips from their sockets. Install replacement parts by aligning them properly and securing them firmly. Ensure all connections are tight and meet Veeder-Root specifications. After replacement, power up the system and run diagnostic tests to verify functionality. Consult the manual for specific module replacement instructions and always use genuine Veeder-Root parts. Document the replacement in maintenance records for future reference and compliance. Follow safety protocols to avoid damage or injury.

Calibration and Testing
Calibration ensures accurate sensor readings, while testing verifies system performance. Follow Veeder-Root guidelines to calibrate probes and sensors, then conduct thorough performance tests to confirm functionality and reliability.
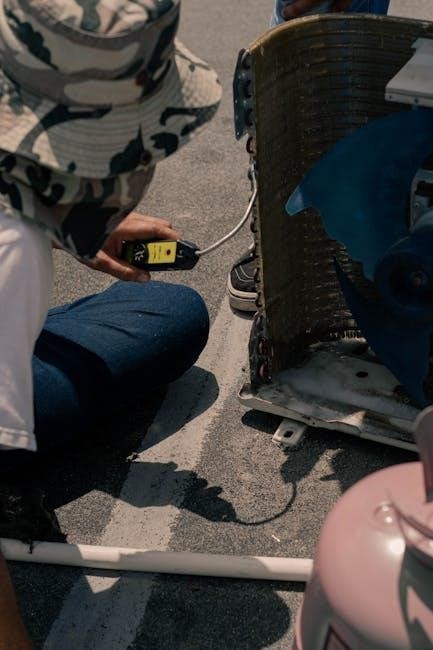
6.1 Calibrating Sensors and Probes
Calibrating sensors and probes is essential for ensuring accurate measurements and reliable performance. Begin by following Veeder-Root’s specific calibration guidelines, which may involve using diagnostic tools to verify sensor accuracy. Check wiring and connections to ensure they meet the system’s requirements, as outlined in the manual (P/N 576013-879). Perform an intrinsic safety check to prevent potential hazards. Once calibration is complete, conduct a series of tests to confirm that sensors and probes are functioning correctly. Refer to the manual for detailed calibration procedures and troubleshooting tips. Proper calibration ensures precise data collection and maintains compliance with safety standards. If issues persist, contact TLS Systems Technical Support for additional assistance.
6.2 Conducting System Performance Tests
After calibration, conduct system performance tests to ensure all components function correctly. Initiate test modes through the console or diagnostic software. Verify communication between sensors, probes, and the central unit. Check data accuracy and response times. Test alarm triggers and ensure proper notifications. Review test results to identify any discrepancies. Document findings for future reference. Refer to the system manual for specific test procedures. If performance issues persist, consult technical support or replace faulty components. Regular testing ensures reliability and compliance with operational standards, maintaining accurate monitoring and reporting capabilities. This step is crucial for verifying system integrity and readiness for continuous operation.
Documentation and Compliance
Maintain detailed records of troubleshooting activities, repairs, and system tests for audit purposes. Ensure compliance with safety standards and regulatory requirements throughout the process.
7.1 Maintaining Troubleshooting Records
Accurate documentation of all troubleshooting activities is essential for compliance and future reference. Records should include the date, issue identified, steps taken, and outcomes achieved. This ensures accountability and provides a clear audit trail for regulatory inspections. Additionally, maintaining detailed logs helps in identifying recurring issues, enabling proactive maintenance and continuous improvement of the system. Proper storage and organization of these records are crucial for efficient retrieval and analysis.
7.2 Ensuring Compliance with Safety Standards
Adherence to safety standards is critical when troubleshooting the Veeder-Root TLS-350 system. Always follow local and industry regulations, such as those set by the California Air Resources Board, to ensure intrinsic safety and environmental compliance. Proper grounding, wiring, and use of approved components are essential to prevent hazards. Regular system checks and calibration ensure accurate monitoring and reporting, maintaining compliance with environmental protection standards. Training and certification programs for technicians further guarantee that all procedures are performed safely and correctly, upholding the system’s reliability and legal requirements.
The Veeder-Root TLS-350 manual serves as a vital resource for effective troubleshooting, ensuring system longevity and performance. Regular maintenance and adherence to guidelines are essential for optimal functionality.
8.1 Summary of Key Troubleshooting Steps
This section summarizes the essential steps for troubleshooting the Veeder-Root TLS-350 system. Begin by verifying wiring and connections to ensure compliance with safety standards. Check for error codes and alarms, and refer to diagnostic tools like the FX Leak Detector for detailed insights. Replace faulty modules such as the ECPU board or software chips using the chip removal tool. Conduct intrinsic safety checks and calibrate sensors to maintain accuracy. Regularly update software and perform system performance tests. Document all troubleshooting activities and ensure compliance with environmental monitoring standards. Contact TLS Systems Technical Support for additional assistance. By following these steps, you can effectively identify and resolve issues, ensuring optimal system functionality and longevity.
8.2 Best Practices for Ongoing Maintenance
Regular maintenance is crucial for ensuring the Veeder-Root TLS-350 system operates efficiently and accurately. Schedule routine inspections of wiring, sensors, and probes to prevent malfunctions. Calibrate sensors and probes periodically to maintain precision. Update software modules and replace outdated components to keep the system current. Document all maintenance activities for future reference and compliance. Train personnel on proper troubleshooting techniques to address issues promptly. Implement a preventive maintenance schedule to avoid unexpected downtime. By adhering to these best practices, you can extend the system’s lifespan, reduce errors, and ensure compliance with safety and environmental standards. Consistent upkeep is key to maximizing the TLS-350’s performance and reliability.